Ready to take your gardening skills to the next level? Raised beds are a fantastic way to grow healthy plants and maximize your garden’s potential. Whether you’re a beginner or a seasoned gardener, this method offers numerous benefits, from better soil quality to improved drainage.
Building a raised bed is simpler than you might think. With the right materials and a bit of planning, you can create a sturdy and attractive space for your plants. This guide will walk you through the essentials, from choosing the perfect spot to selecting the best materials for your project.
By the end, you’ll have all the knowledge needed to start your own garden bed. Let’s dig in and transform your gardening experience!
Key Takeaways
- Raised beds improve soil quality and drainage.
- They maximize space and make gardening easier.
- Choosing the right materials ensures durability.
- Proper planning leads to a successful project.
- This method is suitable for all skill levels.
Introduction: Elevate Your Gardening Experience
Transform your outdoor space with a simple yet effective gardening solution. Raised beds offer a practical way to grow healthier plants while maximizing your garden’s potential. Whether you’re a beginner or an experienced gardener, this method brings numerous advantages.
One of the key benefits is improved drainage. Unlike traditional planting, raised beds allow excess water to flow away, preventing root rot. Additionally, you can control the soil quality, ensuring your plants get the nutrients they need.
Another advantage is the ease of maintenance. With a raised garden bed, you’ll spend less time bending over and more time enjoying your plants. The elevated design also helps keep weeds at bay, making your gardening experience more enjoyable.
In this guide, you’ll learn the step-by-step process to create your own raised bed. From selecting the right materials to choosing the perfect spot, we’ll cover everything you need to know. Let’s get started and elevate your gardening game!
- Improved drainage prevents waterlogging.
- Better soil quality leads to healthier plants.
- Elevated design reduces strain on your back.
- Weed control becomes simpler and more effective.
- Step-by-step instructions ensure a successful project.
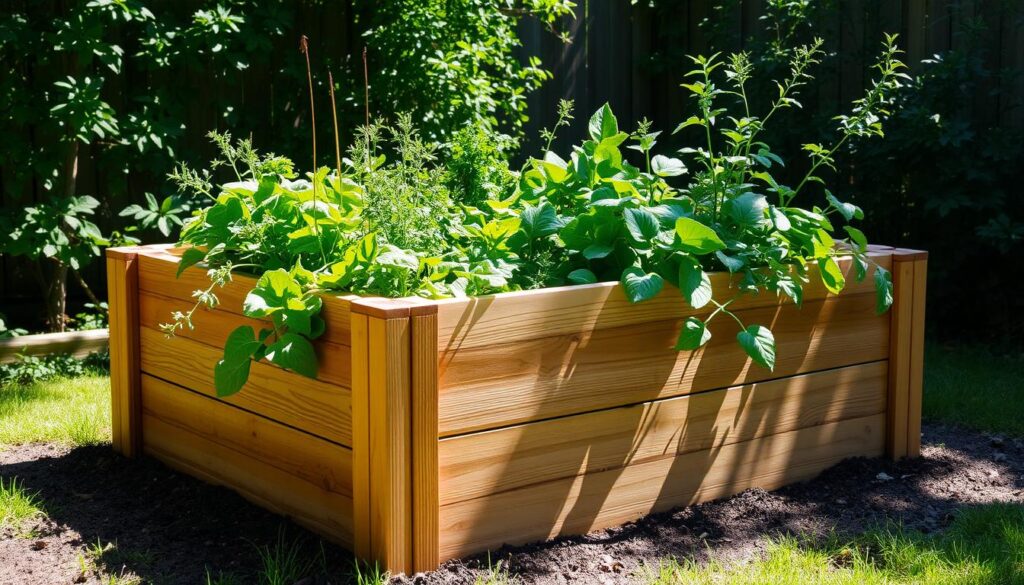
Benefits of Raised Garden Beds
Discover the advantages of elevated gardening with raised beds. This method offers a practical way to grow healthier plants while maximizing your garden’s potential. From better drainage to improved soil quality, the benefits are numerous and impactful.
Improved Drainage and Soil Quality
One of the standout features of a raised bed is its superior drainage. Excess water flows away easily, preventing root rot and waterlogging. This ensures your plants stay healthy and vibrant.
You also have full control over the soil mix. By using high-quality, nutrient-rich soil, you can create the perfect environment for your plants to thrive. This customization leads to stronger roots and better growth.
Enhanced Crop Yield and Comfort
Raised beds allow for deeper, more aerated soil, which boosts crop yields. Plants have more space to grow, resulting in healthier and more abundant harvests. This makes it an ideal choice for both vegetables and flowers.
Comfort is another key benefit. The elevated design reduces the need for bending, making gardening easier on your back. Weeding and maintenance also become simpler, saving you time and effort.
- Superior drainage prevents waterlogging and root rot.
- Custom soil mixes improve plant health and growth.
- Deeper soil leads to higher crop yields.
- Elevated design reduces strain and simplifies maintenance.
Essential Tools and Materials for Your Project
Building a raised bed starts with the right tools and materials. Whether you’re a beginner or an experienced gardener, having the correct items ensures a smooth and successful project. From sturdy lumber to reliable hardware, every choice matters.
Recommended Lumber and Treated Wood Options
Choosing the right wood is crucial for durability. Pressure-treated lumber is a popular choice due to its resistance to rot and pests. However, some gardeners prefer alternatives like cedar or white oak for their natural durability and aesthetic appeal.
Keep in mind that treated wood may contain chemicals. If you’re growing edible plants, opt for untreated or naturally rot-resistant options. This ensures your soil and plants remain safe and healthy.
Must-Have Gardening Tools
Equip yourself with essential tools to make the process easier. A sturdy shovel, tape measure, and level are indispensable for setting up your raised bed. Power tools like a circular saw and drill driver can save time and effort during assembly.
Always prioritize safety when handling power tools. Wear protective gear and follow manufacturer instructions. With the right tools, you’ll create a sturdy and attractive garden bed that lasts for years.
- Pressure-treated wood offers durability and pest resistance.
- Cedar and white oak are natural, chemical-free alternatives.
- Essential tools include shovels, levels, and drill drivers.
- Safety gear is a must when using power tools.
- Quality materials ensure a long-lasting project.
Preparing Your Garden Site
Setting up the perfect spot for your garden is the first step to success. A well-prepared site ensures your plants thrive from the start. Begin by choosing a location that’s flat, sunny, and free of debris. This foundation will make your gardening experience smoother and more enjoyable.
Leveling the Ground
Start by assessing the area for high and low spots. Use a shovel to remove excess dirt or add paver sand to even out the surface. A level ground prevents water from pooling and ensures your raised bed stays stable over time.
If the terrain is uneven, consider using gravel or sand to create a flat base. This method is especially useful for complex landscapes. A level site not only supports your garden bed but also promotes healthy plant growth.
Choosing a Sunny, Flat Location
Sunlight is essential for your plants to flourish. Pick a spot that receives at least six hours of direct sunlight daily. This ensures your plants get the energy they need to grow strong and healthy.
Accessibility is another key factor. A flat, easily reachable site makes planting, watering, and maintenance simpler. This setup saves you time and effort in the long run, allowing you to focus on enjoying your garden.
- Assess the site for high and low spots before leveling.
- Use paver sand or gravel to create a flat surface.
- Choose a location with full sun exposure for optimal growth.
- A flat, accessible site simplifies maintenance and enhances success.
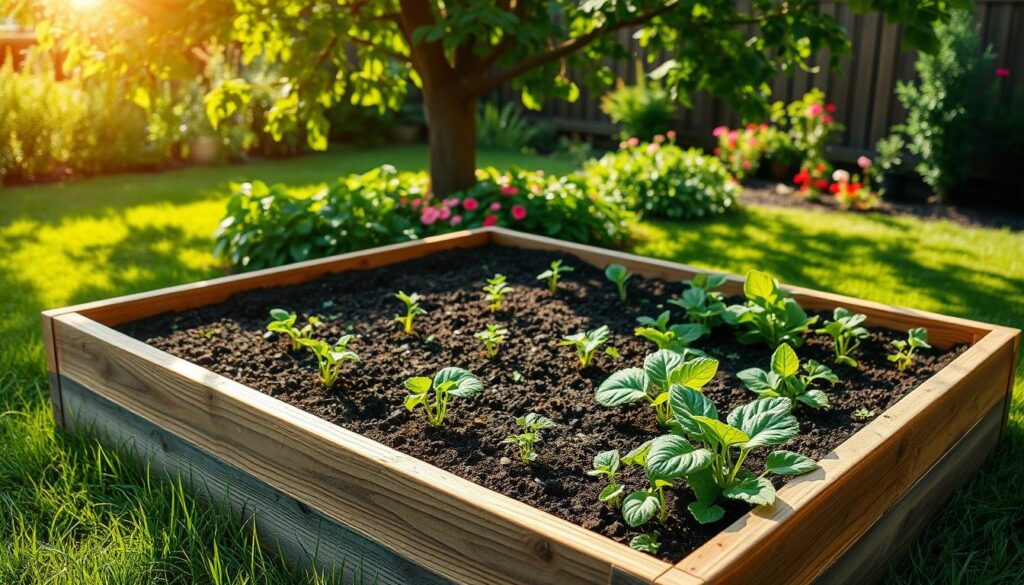
Planning Your Raised Garden Bed Design
Designing a raised bed requires careful planning and precise measurements. A well-thought-out layout ensures your garden bed is both functional and visually appealing. Start by considering the available space and the needs of your plants.
Measurements and Layout Considerations
Accurate measurements are crucial for a successful project. A width of 4 feet is ideal for easy access from both sides. This size allows you to reach the center without stepping on the soil, which can compact it and harm plant roots.
When planning the length, consider the available space and your gardening goals. Longer beds can accommodate more plants, but ensure they fit comfortably in your garden area. A balanced, square structure is easier to maintain and looks more cohesive.
Arranging the boards and corners correctly is essential for stability. Use lumber that’s durable and resistant to rot. Pre-drill holes for screws to prevent splitting the wood. This step ensures your raised bed remains sturdy for years.
Calculating the required soil volume is another important factor. Measure the depth of the bed to determine how much soil you’ll need. Deeper beds allow for better root growth and healthier plants.
Finally, think about aesthetics. Align your garden bed with existing paths or features for a cohesive look. A well-planned design not only enhances functionality but also adds beauty to your outdoor space.
- Choose a 4-foot width for easy access and maintenance.
- Ensure the length fits comfortably in your garden area.
- Use durable lumber and pre-drill holes for stability.
- Calculate soil volume based on bed depth for optimal plant growth.
- Align the bed with existing garden features for a cohesive design.
Step-by-Step Guide: How to Make a Raised Garden Beds
Crafting a raised bed is easier than you think with the right steps. This guide will walk you through preparing and cutting the boards, assembling the structure, and ensuring everything is level and secure. Follow these instructions to create a sturdy and functional garden space.
Preparing and Cutting the Boards
Start by measuring and marking the lumber for your project. Use a tape measure to determine the desired length and width of your raised bed. Mark the measurements clearly with a pencil.
Next, cut the boards using a circular saw. Always wear safety goggles and gloves when handling power tools. Double-check your measurements before cutting to ensure accuracy.
“Measure twice, cut once. Precision is key to a stable structure.”
Once the boards are cut, sand the edges to remove splinters. This step ensures safety and a polished look for your garden bed.
Assembling the Structure with Care
Lay the cut boards on a flat surface to begin assembly. Align the corners carefully to ensure the structure is square. Use a level to check that the boards are even.
Pre-drill holes for the screws to prevent the wood from splitting. Secure the corners with screws, ensuring the structure is stable. Repeat this process for all sides of the raised bed.
Finally, place the assembled bed in your chosen space. Ensure the ground is level before filling it with soil. This step guarantees proper drainage and healthy plant growth.
| Tool | Purpose |
|---|---|
| Tape Measure | Accurate measurements |
| Circular Saw | Cutting boards |
| Level | Ensuring even surfaces |
| Drill | Securing screws |
With these steps, your raised garden bed will be ready for planting. Take your time to ensure each step is done correctly for a durable and functional project.
Creating Optimal Drainage and Weed Control
Effective drainage and weed control are key to a thriving garden space. A well-designed raised bed ensures your plants get the right balance of water and nutrients. Proper drainage prevents waterlogging, while a solid barrier keeps weeds and pests at bay.
Lining the Bottom and Sides Effectively
Start by lining the bottom of your garden bed with landscape fabric or weed barrier cloth. This step prevents soil loss and stops weeds from growing up into your plants. For added protection, extend the fabric up the sides of the bed.
Securing the fabric is crucial for durability. Use staples or heavy-duty pins to keep it in place. This ensures the lining stays intact, even after heavy rain or frequent watering. A well-lined bed maintains a healthy environment for your plants to thrive.
Proper drainage is essential for a nutrient-rich soil mix. Avoid compacting the soil by ensuring water flows freely through the bed. This setup keeps roots healthy and prevents waterlogging, which can harm plants.
- Landscape fabric prevents soil erosion and weed growth.
- Extend the fabric up the sides for full protection.
- Use staples or pins to secure the lining in place.
- Ensure proper drainage to maintain healthy soil.
- A well-lined bed supports robust plant growth.
Securing Your Bed: Fastening and Support Techniques
Ensuring your garden bed stays sturdy and secure is essential for long-term success. Proper fastening and support techniques prevent shifting, bowing, and other structural issues. This section will guide you through the best methods to keep your raised bed stable and durable.
Corner Fastening and Structural Bracing
Start by drilling pilot holes at the corners of your raised bed. This step prevents the wood from splitting when you insert the screws. Use deck screws to secure the corners tightly, ensuring the structure remains stable.
Adding structural bracing is another crucial step. Install horizontal boards along the sides to reinforce the frame. This technique distributes the weight of the soil evenly, preventing the bed from bowing over time.
“Proper fastening ensures your garden bed remains sturdy, even under heavy soil loads.”
Check the squareness of your raised garden bed during assembly. Use a framing square to ensure all corners are at 90 degrees. This accuracy is vital for maintaining the structural integrity of your garden project.
For added durability, reinforce the corners with additional supports. Metal brackets or corner braces can provide extra stability, especially for larger beds. These small additions can significantly extend the lifespan of your raised garden structure.
- Drill pilot holes to prevent wood splitting.
- Use deck screws for secure corner fastening.
- Install horizontal boards for structural bracing.
- Check squareness with a framing square during assembly.
- Reinforce corners with metal brackets for added stability.
Finishing Touches: Adding the Lip and Final Adjustments
Adding the final touches to your project ensures both beauty and durability. These steps not only enhance the appearance of your raised bed but also improve its functionality. A well-crafted lip and precise adjustments make all the difference.
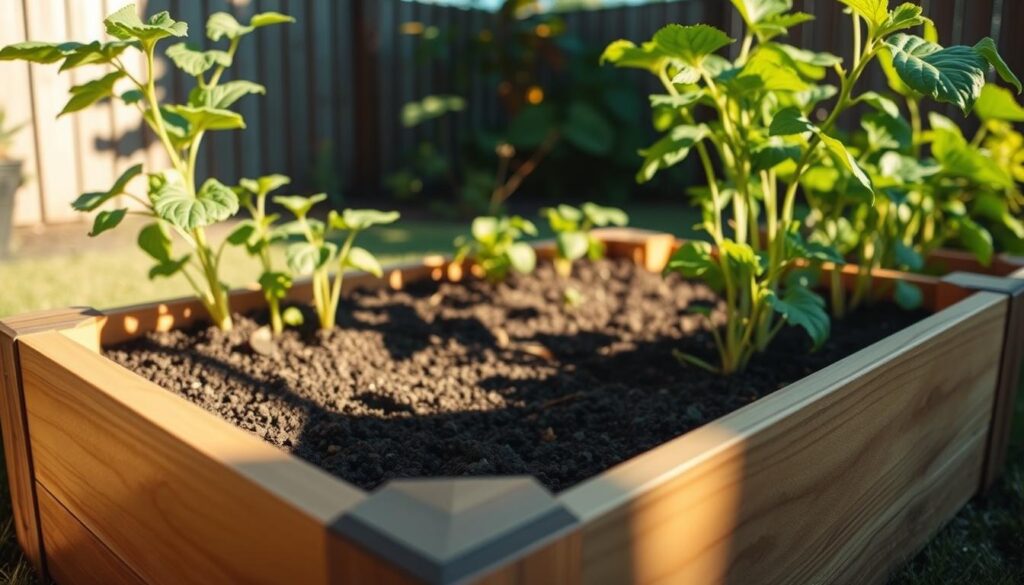
Miter Cutting and Attaching the Cap Boards
Start by miter cutting the boards for the cap. This technique creates a neat, angled edge that fits perfectly along the top of your garden bed. Use a miter saw for precision, ensuring each cut is clean and accurate.
Once the boards are cut, align them along the top edge of the raised bed. Secure them with pilot holes and screws to prevent splitting the wood. This step ensures the cap stays firmly in place, even during heavy rains.
“A well-attached lip not only looks professional but also adds structural integrity to your garden bed.”
After attaching the cap, perform a final level check. Use a spirit level to ensure the top edge is even. This adjustment guarantees a polished finish and prevents soil from spilling out.
- Miter cutting creates a clean, angled edge for the cap.
- Use pilot holes and screws to secure the boards firmly.
- Final level checks ensure a professional and polished look.
- A well-crafted lip prevents soil spillage and adds character.
These finishing touches transform your raised garden bed into a functional and visually appealing addition to your outdoor space. Take your time to ensure every detail is perfect.
Enhancing Aesthetics and Functionality
Elevate your garden’s appeal with thoughtful design and practical features. A well-crafted raised bed not only improves plant health but also adds visual charm to your outdoor space. By blending aesthetics with functionality, you can create a garden that’s both beautiful and easy to maintain.
Design Elements for a Neat Garden Look
Choosing the right materials and colors is key to a cohesive design. Opt for wood like cedar or redwood for a natural, rustic appearance. These materials are durable and complement most garden styles. For a modern touch, consider using composite boards in neutral tones.
Textures also play a role in creating visual interest. Mix smooth and rough surfaces to add depth to your garden bed. Adding decorative edging or a cap along the top can enhance the overall look while protecting the soil from erosion.
Tips to Balance Form and Function
Functionality should never be sacrificed for aesthetics. Incorporate features like built-in seating or trellises to maximize space and usability. These additions make your raised garden more practical while adding to its charm.
Proper spacing between beds ensures easy access for planting and maintenance. Keep pathways clear and wide enough for comfortable movement. This setup not only improves functionality but also creates a neat, organized appearance.
| Design Element | Purpose |
|---|---|
| Wood Type | Adds durability and aesthetic appeal |
| Color Palette | Creates a unified look |
| Edging | Prevents soil erosion and enhances design |
| Built-in Features | Improves functionality and space usage |
Personalize your garden bed with creative touches that reflect your style. Whether it’s a unique paint color or custom carvings, these details make your space truly yours. A well-designed raised garden is not just functional—it’s a reflection of your personality.
Maintaining Your Raised Garden Bed
Keeping your garden in top shape requires consistent care and attention. A well-maintained raised bed ensures your plants thrive and your soil remains nutrient-rich. Regular upkeep not only extends the life of your garden bed but also keeps it looking its best.
Soil Amendments and Regular Checks
Healthy soil is the foundation of a thriving garden. Over time, nutrients deplete, so regular amendments are essential. Add compost or organic matter every season to replenish nutrients. This practice keeps your plants strong and productive.
Inspect your raised bed periodically for signs of wear. Check the wood for cracks or rot, especially at the corners and sides. Reinforce any loose boards to maintain structural integrity. A sturdy frame ensures your garden bed lasts for years.
Weed Control and Pest Management
Weeds and pests can quickly take over if left unchecked. Remove weeds regularly to prevent them from competing with your plants for nutrients. Use natural pest control methods, like neem oil or companion planting, to protect your garden.
Mulching is another effective way to suppress weeds. Spread a layer of mulch around your plants to retain moisture and deter unwanted growth. This simple step keeps your raised garden healthy and low-maintenance.
Seasonal Maintenance Tips
Each season brings unique tasks to keep your garden bed in top condition. In spring, refresh the soil and plant new crops. Summer requires regular watering and pest monitoring. Fall is ideal for cleaning up debris and preparing for winter.
Winter is a great time to inspect and repair your raised bed. Remove old plants and add compost to enrich the soil. Cover the bed with a tarp to protect it from harsh weather. Seasonal care ensures your garden remains productive year-round.
| Task | Frequency |
|---|---|
| Soil Amendments | Every Season |
| Structural Checks | Bi-Annually |
| Weed Control | Weekly |
| Pest Management | As Needed |
| Seasonal Prep | Seasonally |
By following these maintenance tips, your raised garden bed will stay healthy and productive. Consistent care ensures your plants thrive and your garden remains a beautiful, functional space.
Expanding Your Garden Space
Growing your garden space can be both rewarding and practical. Adding extra beds allows you to cultivate more plants and experiment with diverse layouts. Whether you’re a seasoned gardener or just starting, expanding your garden area opens up new possibilities for creativity and productivity.
Planning for Additional Beds
Start by mapping out your new raised beds to ensure they fit seamlessly into your existing layout. Use a string line or measuring tape to maintain consistent spacing between beds. This technique helps create a cohesive and organized garden design.
Consider the flow of your outdoor space when placing additional beds. Align them with pathways or existing structures for a harmonious look. Proper spacing also ensures easy access for planting, watering, and maintenance.
Selecting the Right Locations
Choose locations that receive ample sunlight and have good drainage. Avoid areas with heavy foot traffic or potential obstructions. A well-placed garden bed enhances both functionality and aesthetics.
Modular designs are a great option for expansion. They allow you to add beds gradually as your needs evolve. This flexibility ensures your raised garden grows with you over time.
“A well-planned garden layout maximizes space and minimizes effort, making gardening more enjoyable.”
- Map out new beds for a cohesive design.
- Use alignment techniques for consistent spacing.
- Choose sunny, well-drained locations for optimal growth.
- Opt for modular designs to allow gradual expansion.
- Maintain accessibility for easy gardening tasks.
By carefully planning and expanding your garden space, you can create a thriving and visually appealing outdoor area. Take your time to ensure each new bed complements your existing layout and meets your gardening goals.
Conclusion
Creating a thriving garden space is easier with the right approach. Raised beds offer improved drainage, customized soil mixes, and a sturdy structure for healthy plants. By following the step-by-step guide, you can build a durable and functional garden bed that enhances your outdoor area.
From selecting the right boards to ensuring proper assembly, every detail matters. The elevated design reduces strain and simplifies maintenance, making gardening more enjoyable. With careful planning, your raised garden will flourish for years to come.
Take the first step today and transform your backyard into a vibrant, productive space. Explore further projects to elevate your gardening game and enjoy the rewards of a well-designed raised garden bed.
Frequently Asked Questions
What are the benefits of using raised garden beds?
Raised garden beds offer improved drainage, better soil quality, and enhanced crop yields. They also make gardening more comfortable by reducing the need to bend over.
What materials are best for building raised garden beds?
Cedar and redwood are excellent choices for lumber due to their natural resistance to rot. Treated wood is another option, but ensure it’s safe for edible plants.
How do I choose the right location for my raised bed?
Pick a flat, sunny spot with at least 6-8 hours of sunlight daily. Ensure the area has good drainage and is easily accessible for watering and maintenance.
What size should my raised garden bed be?
A standard size is 4 feet wide by 8 feet long, but you can adjust based on your space. Keep the width under 4 feet for easy access to the center.
How do I ensure proper drainage in my raised bed?
Line the bottom with landscape fabric or hardware cloth to prevent weeds while allowing water to drain. Avoid using solid materials that block water flow.
What tools do I need to build a raised garden bed?
Essential tools include a saw, drill, screws, level, and measuring tape. A shovel and wheelbarrow are also helpful for preparing the site.
How do I secure the corners of my raised bed?
Use corner brackets or screws to fasten the boards securely. For added stability, consider adding support stakes or braces to the structure.
Can I add a lip or cap to my raised bed?
Yes, attaching a cap board with mitered corners gives your bed a polished look and provides a comfortable edge for sitting or leaning.
How do I maintain my raised garden bed over time?
Regularly check the soil quality, add compost or amendments as needed, and inspect the structure for any signs of wear or damage.
Can I expand my garden with additional raised beds?
Absolutely! Plan your layout carefully to ensure proper spacing and accessibility. Adding more beds allows you to grow a wider variety of plants.